VTT Guide
Everything you need to know about using the Far Reach Co. Virtual Table Top.
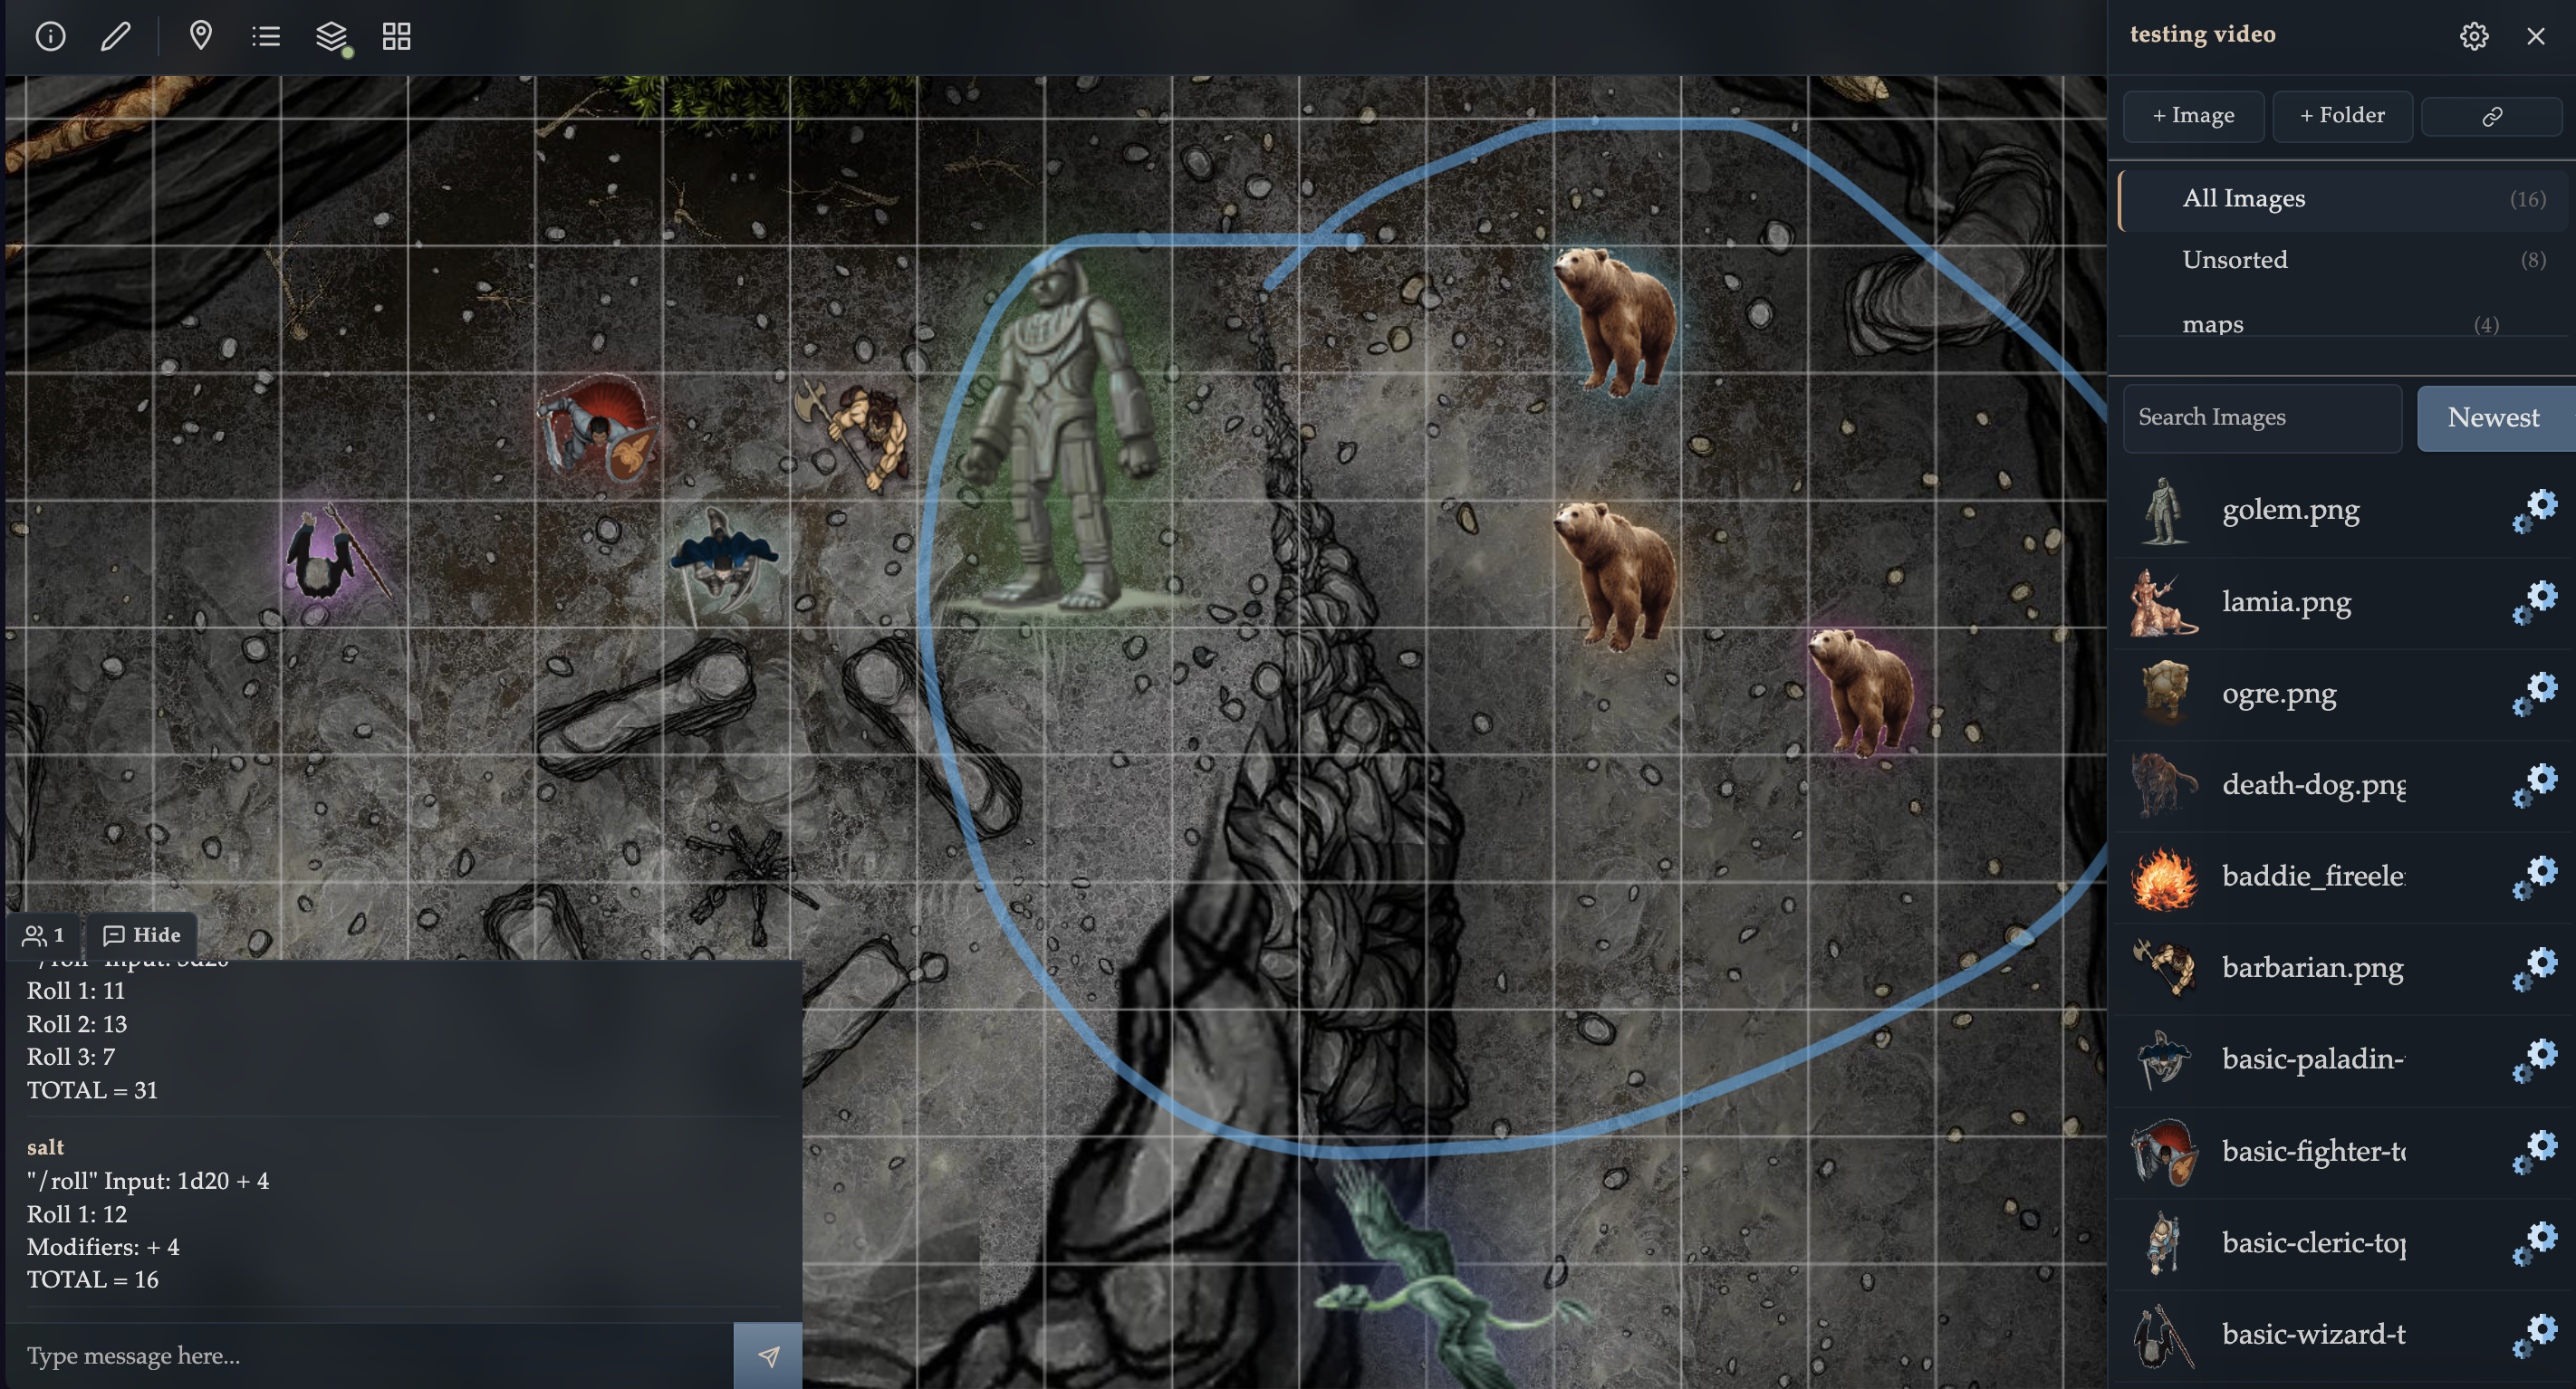
No-Signup VTT | Virtual Tabletop For D&D 5ESetting Up Your First Table
To get started with the VTT, you first need to create a table.
- From your Dashboard, click New Table to create a standalone table, or navigate into a Wyrld and create a table there.
- Choose a table mode: Standard (full toolset) or Sandbox (focused practice mode).
- Give your table a name and click create. You will be taken to the VTT canvas immediately.
- The VTT loads with an empty canvas. Use the sidebar (toggle it from the toolbar) to upload images and manage your table.
Visibility & Permissions
The meaning of Public depends on where the table was created.
Standalone/User Tables (created from Dashboard)
- Private — only the table owner can open the table.
- Public — anyone with the link can open the table (including users without a Wyrld).
Wyrld Tables (project-backed)
- Private — only Wyrld managers/editors can open the table.
- Public — any member of that Wyrld can open the table after logging in. It is not open to the public internet.
How VTT Permissions Are Assigned
- Managers/Owners — full table management tools for the selected mode (Standard or Sandbox).
- Non-manager participants — can move/resize/rotate objects on tables they can access.
- Non-manager restrictions — no image/folder management, table settings, location pin management, grid controls, or layer management unless manager permissions are granted.
Sandbox Mode
Sandbox tables are designed for fast map/token rehearsals without advanced campaign tooling.
What Sandbox Supports
- Layers — You can switch between Map, Object, and Fog layers.
- Grid Controls — You can show/hide the grid and resize it.
What Sandbox Restricts
- No image library management — image upload and folder management are disabled.
- No pack discovery or install management — pack search/discovery plus install/uninstall controls are disabled.
- No location pins or portals — pin creation and portal linking are disabled.
- No table migration control — Change Table is disabled in table settings.
Guest Sandbox
- The Try VTT Sandbox (No Signup) flow opens a guest sandbox with a curated starter token set.
- Guest sandbox links are collaborative: anyone with the guest sandbox link can join that temporary sandbox session.
- Guest sandboxes are temporary demo environments intended for quick testing and onboarding.
Table Templates
Use templates to save a table setup and quickly apply it to other tables.
Plan Requirement
- User tables — templates require Pro User.
- Wyrld tables — templates require Pro Wyrld for that Wyrld.
Where to Find It
- Open the sidebar and click Table Settings (gear icon).
- In the Templates section, enter a template title and save.
Template Scopes
- User Template — available to your account.
- Wyrld Template — available to managers/editors in that Wyrld.
Permissions
- User tables — only the table owner can save user templates.
- Wyrld tables — managers/editors can save and manage Wyrld templates.
- Applying Wyrld templates — only to tables in the same Wyrld.
Loading and Deleting Templates
- Select a template from Load Template and click Load to apply it to the current table.
- Loading a template re-initializes connected viewers on that table so everyone sees the updated state.
- Select a template and click Delete to remove it (with confirmation).
Navigating the Canvas
The canvas is the main play area where tokens, maps, and drawings live.
Desktop
- Pan — Click and drag on empty canvas space to move around.
- Zoom — Use the scroll wheel or toolbar zoom controls (- / + / Reset) to zoom in and out. Zoom is capped at 300%.
- Select — Click on any object to select it. A selected object shows handles for resizing and rotating.
- Move — Click and drag a selected object to reposition it (if the object is unlocked).
- Lock State — Selected objects show Locked / Unlocked status in the object panel below the toolbar.
Mobile / Touch
- Pan — Drag with one finger on empty space.
- Zoom — Pinch with two fingers to zoom in or out.
- Select — Tap on an object to select it.
Adding Images & Organizing with Folders
The sidebar (GM-only) is where you manage all images for your table.
Uploading Images
- Open the sidebar using the sidebar toggle button on the toolbar.
- Click + Image to open the upload dialog.
- Select one or more image files. You can optionally check "Make image small" to resize large images to 100px width, which helps with loading times.
- Uploaded images appear in the sidebar image list.
Folders
- Click + Folder to create a folder for organizing your images.
- Navigate into a folder by clicking on it. Images uploaded while inside a folder are placed there automatically.
- You can create sub-folders for deeper organization (e.g., "Maps", "NPCs", "Players").
Library Packs (Pro)
- Personal library — Library Packs require Pro User for your account.
- Wyrld library — Library Packs require Pro Wyrld for that Wyrld.
- When unavailable, the sidebar shows a Packs (Pro) tab indicator.
- In sandbox mode, installed pack images can still be used, but discovery/search and install/uninstall management stay disabled.
- For full library/discover/ownership behavior, see the Library Packs Guide.
Placing Tokens on the Canvas
Once images are uploaded to the sidebar, you can place them on the canvas.
- Use any of these methods: click an image thumbnail to place it at the center of your view, click the + button on an image row, or click + drag to drop it in a specific spot.
- Once placed, click on the token to select it. You can then move, resize, or rotate it using the handles.
- Managers can use the Lock / Unlock control in the selected object panel to keep objects fixed in place.
- Managers can use Hide from players / Show to players in the selected object panel to control per-object player visibility.
- Use the Delete toolbar button or the Delete/Backspace key to remove a selected object.
- Use the Move to Top toolbar button to bring a selected object to the front of its layer.
Using Layers (Map, Object, Fog)
Layers let GMs control the stacking order and visibility of objects. There are three layers:
- Map Layer — Place background maps and terrain here. Map objects sit behind everything else.
- Object Layer — The default layer for tokens, NPCs, and interactive pieces. These sit on top of the map.
- Fog Layer — Use fog to show area of effect spells etc. Fog objects render above everything and have a slightly transparent look.
Switching Layers
- Click the Layers button on the toolbar to open the layers panel.
- Click Switch Layer to cycle between Map, Object, and Fog.
- The current layer is shown as a colored badge on the layers button. Objects you place or interact with will be on the active layer.
- You can also press Ctrl + T with object(s) selected to move them to the next layer.
Grid Controls
The grid helps with tactical movement and positioning. It is a GM-only feature.
- Click the Grid button on the toolbar to open the grid panel.
- Click Show Grid to display the grid lines and enable snap-to-grid for token movement.
- Set the grid dimensions (Width and Height in squares) and click Resize to change the grid area.
- Grid changes are synced to all connected users in real time.
Drawing Tools
Draw and annotate directly on the canvas. Useful for marking paths, highlights, and quick notes.
- Click the Pencil button on the toolbar to toggle draw mode.
- When draw mode is active, a sub-bar appears where you can choose a tool (Freehand, Line, Rectangle, Ellipse, Text) and set color and width.
- In draw mode, existing objects are not selectable, which prevents accidental token/object edits while sketching.
- Use Ctrl/Cmd + Z (or the Undo button in the draw bar) to undo the most recent drawing object while draw mode is active.
- Click the pencil button again to exit draw mode and return to normal selection.
Location Pins (GM)
Location pins are markers you place on the canvas to label points of interest, link descriptions, and create portals between tables.
Creating a Pin
- Click the Pin button (map-marker icon) on the toolbar. A new pin appears at the center of your current view.
- The pin is created immediately with the default title "New Pin". It turns red when selected so you can easily spot the active pin.
- The pin's info panel appears below the toolbar with the pin's title, description, and action buttons.
- New pins start locked in position. Managers can unlock a selected pin from the pin panel when repositioning is needed.
Editing a Pin
- Select a pin on the canvas, then click Edit pin in the info panel.
- In the edit dialog you can set the title, description, and attach portal links to other tables.
- Click Save to apply your changes. The info panel updates immediately.
Portals
- When editing a pin, you can attach one or more tables as portal destinations.
- Once saved, the info panel shows clickable portal links. Clicking a portal link transports all connected users to that table in real time.
- Use portals to connect dungeon rooms, move between world maps and encounter maps, or link any set of tables together.
Deleting a Pin
- Select a pin and click Delete in the info panel. You will be asked to confirm.
- The keyboard Delete/Backspace shortcut does not remove pins — this prevents accidental deletion. Use the Delete button in the info panel instead.
Managing Pins
- Click the Manage Pins button (list icon) on the toolbar to open the pin manager.
- The manager lists every pin on the current table with its status: Active (visible on canvas) or Missing from canvas (orphaned).
- For active pins, click Locate to pan the canvas directly to that pin, or Delete to remove it.
- For orphaned pins (created but no longer visible), click Restore to recreate the pin shape at the center of your view, or Delete to remove the record.
Chat & Dice Rolling
The chat box is located at the bottom-left of the VTT. All connected users can send messages and roll dice.
Messaging
- Type a message and press Enter or click the send button.
- Messages are visible to all users on the same table in real time.
- URLs in messages are automatically turned into clickable links. Image URLs display inline.
Dice Rolling — /roll
Use the /roll command to roll dice. The format is:
[number of dice]d[sides]+[modifier]
- [number of dice] — How many dice to roll (e.g., 2).
- [sides] — The type of die (e.g., 6 for a d6, 20 for a d20).
- [modifier] — (Optional) A number added to the total. Multiple modifiers are summed.
Example: /roll 2d6+3 rolls two 6-sided dice and adds 3 to the total. Rolling the maximum on a die shows "CRITICAL".
SRD Lookup — /5e
Use the /5e command to search the D&D 5th Edition SRD without leaving the table. Ask about spells, monsters, equipment, rules, and more.
- Format —
/5e <question> - Example:
/5e what spells deal fire damage at level 3? - Example:
/5e info on grappled condition - Answers include links to full detail pages for spells, monsters, equipment, and magic items.
Keyboard Shortcuts
| Key | Action |
|---|---|
| Alt / Option | Hold + drag to box-select multiple objects |
| Shift | Hold + click to add objects to current selection |
| Delete / Backspace | Remove selected object(s) from the canvas |
| Ctrl + T | Cycle selected object(s) to the next layer (Map → Object → Fog) |
| Ctrl + D | Duplicate selected object(s), placing copies nearby |
| Ctrl/Cmd + Z | Undo most recent drawing object (while draw mode is active) |
| Scroll Wheel | Zoom in / out on the canvas |
On macOS, use Cmd in place of Ctrl.
Tips & Tricks
- Auras — Select a token and use the aura color picker (in the object info panel) to give it a glowing halo. Great for marking spell effects, conditions, or highlighting the active character.
- Pings — Double-click on empty canvas space to send a ping animation visible to all users. Use this to draw attention to a specific spot.
- Bulk Object Actions — Multi-select objects to unlock/lock or hide/show the whole selection in one step from the object panel.
- Staging Hidden Content — Managers can keep objects hidden from players while still seeing them (with a visual indicator) to prep reveals mid-session.
- Canvas Log — Open the info modal and click Open Log to view a list of every object on the canvas. Click an entry to select it, useful for finding hidden or overlapping objects.
- Linking Records — If an image is associated with a Record that has "Make Public" enabled, selecting that token on the canvas will show a link to the record. This is great for linking character sheets or monster stat blocks to their tokens.
- Pin Portals — Chain pins with portals to build interconnected dungeons. Place a pin on a doorway, attach the destination table as a portal, and your players can hop between rooms with a single click.
- Folder Organization — Use folders to separate maps from tokens. Create sub-folders per session or encounter for quick access during play.
- Small Images — When uploading many tokens, enable "Make image small" to reduce file size and speed up loading for all users.